

Apparel
A great way to haul bulky items. See what handlebar bags and harnesses we like to mount between the bars.

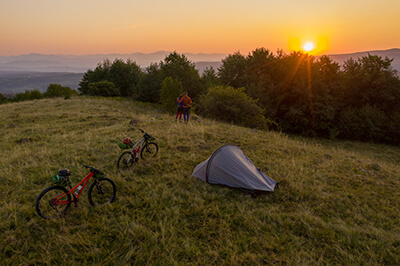
Camping Gear
Carry the heaviest gear close to the center of your ride. Check out our favorite frame bags to load up for your next adventure.

Navigation
Large capacity, streamlined and out of the way. Check out these seat bags that work great on the most gnarly of singletrack trails.

Survival Gear
An excellent bag option to create a little extra space and keep vital items close at hand. Have a look at these awesome top tube bags


Bikepacking Gear
There is no hard or fast rule for how you should pack your bikepacking bags. Because there is no simple answer it is a question riders are always asking. The truth is, the way you pack your bags is an art form that will develop with trial and error. With that in mind at Bike2Nature we have a few tips on what bags to use and ways to help make your packing better.
What Bag Setup is Best for Bikepacking?
Most people go bikepacking into rugged and remote areas. The less is more mentality is a best practice here. A lighter minimalistic bag setup makes climbing and navigating tight single track more enjoyable. Being lighter means being faster, agile and more efficient. A light weight and streamlined bag setup improves the experience. Here’s a list of bags for keeping things nimble.
The Setup we Recommend
- A handlebar bag
- Frame bag
- Seat bag
- Top tube bags
This type of setup incorporates using four types of bags. This system does not need racks. Instead the bags attach to the bicycle itself to keep things lighter. Depending on how much gear you like the pack with you, you may need to use all these options or only a few. For a bag setup like this you can expect to pay around $100-$1000 depending on bag quality, size and features.
Why Not Panniers
Traditional bicycle touring often used racks and panniers. Though panniers allow us to pack a lot of gear they are bulky and not ideal for technical terrain. This is why touring rides are on pavement and not rough roads or trails.
Many riders like using panniers for bikepacking and that’s okay. The advantages to panniers is they hold a lot and are easy to load and unload. We have used panniers for years on trails. It isn’t that they don’t work, they do. Yet we have found this setup to work better as our riding styles have evolved.
How to pack your bags for Bikepacking
Weight distribution is the most important thing to note when loading up your rig. As we attach gear to our bike it changes the way the bike handles. Riding a bike for long distances that is unstable, doesn’t turn or climb well isn’t much fun. So where should the weight go?
How to pack a Handlebar Bag
When bikepacking you need to make use of as much real estate that you can to haul your stuff. Beginning at the front your handlebars have room for attaching bulkier items. Using a handlebar bag, roll or harness is the best way to do this. Because we steer using our handlebars we want things mounted here to be lightweight. So what should we put in our handlebar bag?
Lightweight tents or sleeping bags and sleeping pads are ideal to load up here. Depending on the size and weight of your tent or bivy, it can go on your bars. Some tents are around one pound in weight and that’s okay. If your tent is heavier than that, you’ll want to try packing that elsewhere in your setup. We also need to be careful about clearance between the bars. Space between drops, controls, and the front wheel can be a problem. Sometimes adding longer control cables or spacers between the bag and bars can help. Also having a wider bag that can pack shorter creates options when clearance is a concern. There are many great handlebar bag options out there, take the time to find the right setup for your ride.
What to pack in a Frame Bag
Mounting a frame bag within the triangle of your bike’s frame is a brilliant use of space. Because of its central location in the bike frame it is perfect for heavy things. Packing heavier items here will keep the bike stable and maintain it’s agile handling. Bulky items won’t fit in frame bags because of how narrow they are. That said, if your tent is compact but too heavy to go on the handlebars there is a good home for it here in the frame bag. Because of size and weight hydration, tools, food, small cookware and camp fuel also work well here. We will put some clothes in our frames bag too. Though we will only store the clothes we need for our ride here. This is because of the easy access provided by the frame bag. Our bulkier casual clothes for camp, they go elsewhere.
What to Load into a Seat Bag
Large capacity seat bags have become the bag of choice for the back of the bike. Not relying on racks, seat bags are lighter than traditional panniers. The seat bag has become more popular as it is less wind resistant and is easier to ride with on technical trails. They also bounce around less than panniers do. So what to put in a seat pack? Because the seat bag is the largest bag in the setup it is great for bulky things. Items like casual clothes for camp or a sleeping bag that didn’t fit on the bars. At night when things cool off you’ll be happy to have a warmer change of clothes for camp. The issue with clothes is they take up so much space. The seat bag is the answer. Again pack heavier things toward the bottom of the bag. This will distribute the weight closer to the seat post and help the bike balance better. The drawback to seat bags, especially larger bags is that they can sway or wag when riding. Keeping the weight lower in the bag will help reduce this. Keep in mind when shopping for seat packs, you do get what you pay for. A better quality pack will cinch up tighter against the saddle eliminating any movement or wag.
Top Tube Bags
There will be some gear left over that didn’t quite fit in the three larger bags. This is where the top tube bag is a great addition to your setup. Top tube bags aren’t large but they are accessible while riding. We use these bags for vital items such as phones, wallets, passports and food. Mounted either at the stem or seat post you’ll always have an eye on your top tube bag. Keeping valuables in sight helps prevent them from getting lost. Also there alway seems to be that awkward piece of kit that struggles to fit in. For stuff like this there is a spot available in the top tube bag.
First in Last Out
One final tip for packing up your bags. Load up your bags in reverse of how you will unload them. Keep gear that you may need during your ride near the opening of your bags. Also pack stuff for camp toward the bottom. This will prevent the need to unpack your entire rig to dig out that extra layer, tool or snack in the middle of the trail.
Bringing it Home
This bag setup has served us well on many adventures. The bags that we talked about work for overnight trips as well as multi-week excursions. Over time and with experience you’ll fine tune your bikepacking rig to suit your trips. This basic setup will give you the foundation of a versatile rig to adapt and use on many journeys. So get out there and bike to nature.